In a fit of nostalgia, I taught myself to program assembly language for the granddaddy of all consoles – the Atari 2600.
This is a bare metal experience. Code samples and interactive demo follow.
File with – forged own cutlery, made own soap, grew wheat to bake a cake.
As time goes on, I increasingly recognize that I grew up straddling a technological and social faultline. The information age, personal computers, and computer games all came into their own shortly after I was born. I still recall a time when coin-op arcade games like space invaders were a novelty, when you could still play the pre-digital electro-mechanical games, which can rarely be found these days.
We spent a considerable amount of time dodging pixels half as big as your fist on the original Atari 2600. The Atari was a magical fixture in the basement where my brother and I sat, staring into a 13 inch color TV, while we imagined that coarse blobs of pixels were starships and aliens to be rescued and intrepid cave explorers.
Around 2004, I discovered some really excellent resources online that gave insight into the workings of the 2600. I resolved to write my own Atari game. Without the internet, I think that the effort to collect all that arcane knowledge would have been insurmountable for a casual individual, but there are some real gems out there.
No Frills.
The Atari 2600 hardware processing was based around the 6507 chip, a limited version of the 6502 which was used in many of the home computers and game systems that were starting to become available to consumers. Additionally, it included the Television Interface Adapter – a chip which was designed to interface with CRTs and which provided basic graphics and sound capabilities.
Programming for the TIA is not like programming for modern graphics systems however. It provides two bitmap sprites, two single pixel ‘missiles’, a single pixel ‘ball’ and a 40 pixel ‘playfield’ – which is actually just 20 pixels of background that are mirrored on the left and right sides of the screen. There is no frame buffer. The memory addresses for each item must be updated on the appropriate scan line that it is currently being drawn on.
In order to achieve (for example) a more complicated playfield that is not mirrored, a programmer has to modify the playfield information while the scan line is being drawn. In the above example, the bits for the right half of the screen are flipped right before the right half of the screen is drawn. That transformation happens in the period between when the scan line enters on the left side of the screen, and when it reaches the middle. Its pretty intense timing – direct hardware control, racing against the CRT scanline.
The difficulty of programming for the TIA was offset by the significant amount of control it provided developers. While early games typically stayed within the bounds that the hardware was friendliest to, brilliant coders like Carol Shaw and David Crane pushed the hardware to obtain remarkable results.

The Red Planet.
While I was teaching myself about the mysteries of the 2600, the Mars rover Spirit was just achieving its triumphant landing. I decided to make a game about the rover.
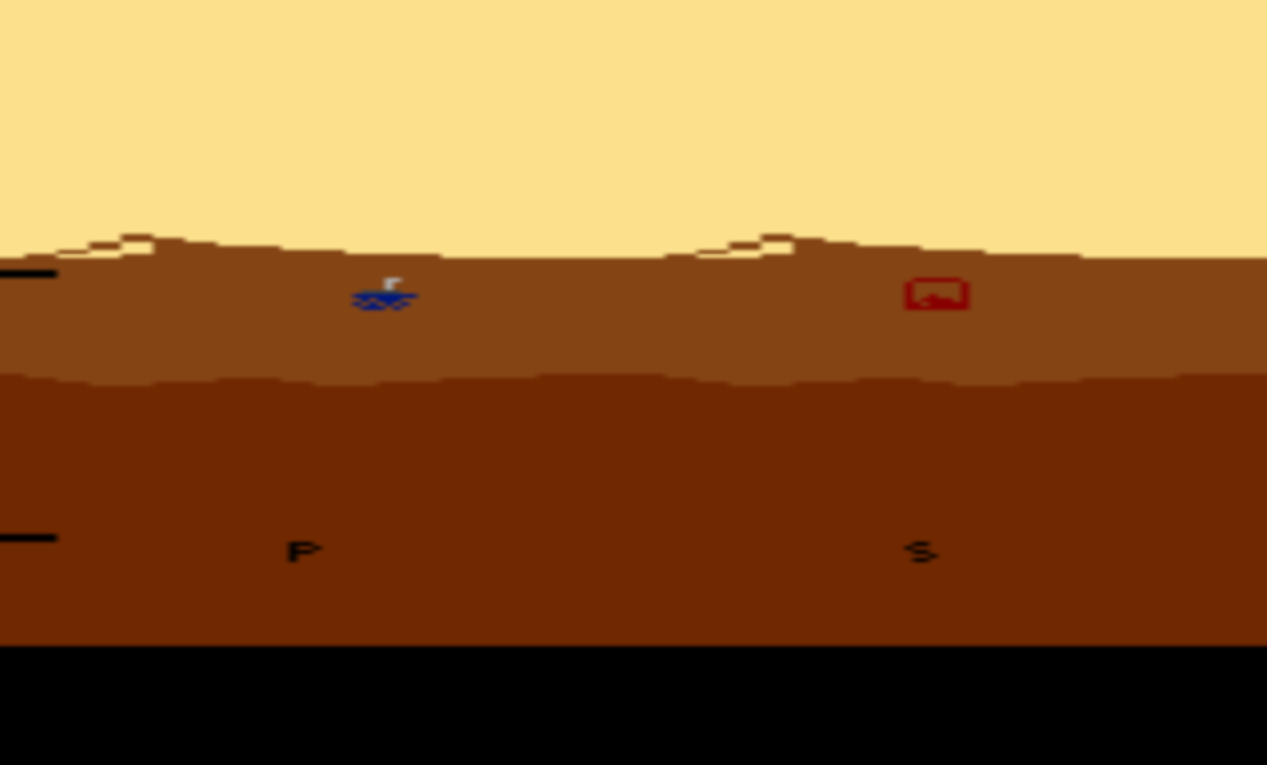
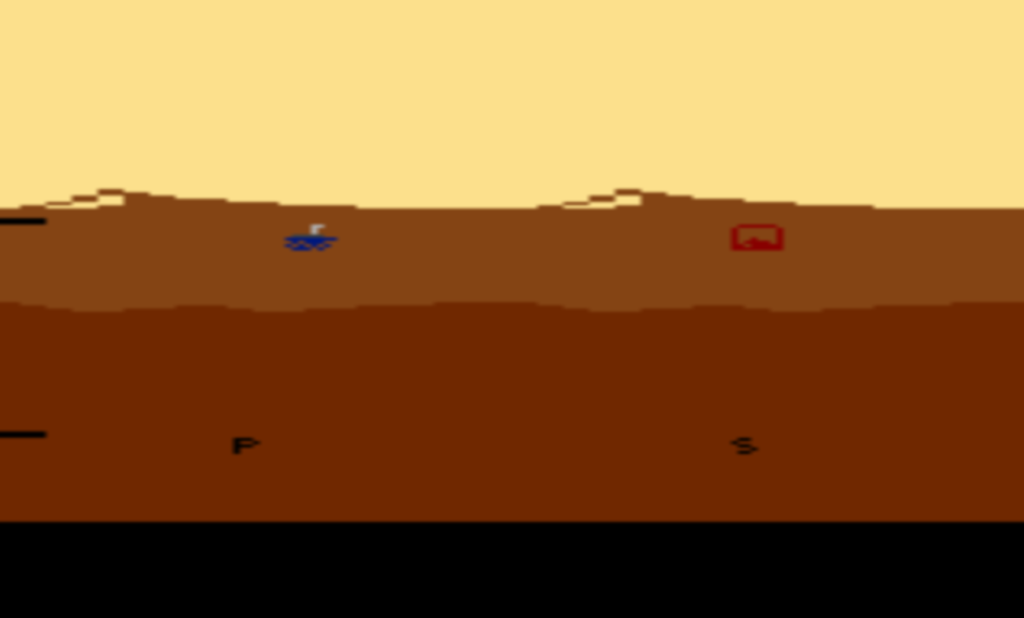
The game concept was this: the little spirit rover would drive across the Martian plains, acquiring “science data” in the form of pickups. It’s energy would deplete slowly. Occasionally, a satellite would fly overhead, and the rover would have to beam up the data from the gathered science – basically, hit the flying satellite with a wave transmission. This would replenish the rover’s energy.
Cycle Counting.
Ok, Lets look at some code.
...
duneZone sta WSYNC                ;this is the label for the address where the hills are drawn
		lda tblHILL0,x    ;load accumulator with info from hill lookup table at offset x
		sta PF0           ;store accumulator in playfield register 0
		lda tblHILL1,x
		sta PF1
		lda tblHILL2,x
		sta PF2
		inx		  ;increment x
		cpx #10		  ;compare x to 10
		bne duneZone      ;if x is not 10, jump to dune label

                                  ;if we are here, x was 10, we are past the dune tops,
                                  ;and instead of drawing, we will precalculate the rover x
                                  ;position in preparation for the next stage ( use every moment! )

        ldx #0                    ;loading x with 0
		lda PlayerX       ;loading the accumulator with the Player's coarse X position
		jsr newMov        ;jump to the new Movement subroutine ( which calcs fine position )
		sty HMP0,x        ;store the y register in Horizontal Motion Register 0 at offset x
		sta WSYNC         ;move can only be called directly after a WSYNC (Wait for SYNC)
		sta HMOVE	  ;cause sprites to move to calculated positions

		lda roverDir      ;load the accumulator with the current rover direction
		sta REFP0         ;store the accumulator in the direction indicator for sprite 0


        ldx #$FF                  ;a solid bitmask
        stx PF0                   ;store it in the playfield register for a continuous
        stx PF1                   ;brown background
        stx PF2

        ldy #8                    ;this will lets us know how many lines to draw for the player
roverZone sta WSYNC
...
Firstly, the hills are drawn – a relatively simple task, and every 10th scanline after they are started, the program additionally calculates the player position, to be used by the next code area – ‘roverZone’. A program can provide ‘breathing room’ in the form of simple screen layers with limited stuff to draw in order to precalculate for the next scan line.
       ldy #8                      ;this will lets us know how many lines to draw for the player
roverZone sta WSYNC                ;the roverZone label in memory
	dey                        ;decrement y
        lda (roverShpPtr),y        ;load the accumulator with the sprite data at the address given
                                   ;by roverShpPtr ( which changes for animation ), offset by y
        sta GRP0                   ;store the accumulator in the player 0 sprite register
        lda tblROVERCol,y          ;load the accumulator with the rover colors, offset by y
        sta COLUP0                 ;store the accumulator in the player 0 color register

       	cpy #0                     ;compare y to 0
        bne roverZone              ;if it's not 0 ( we haven't drawn 7 lines ) return to roverZone

	sta WSYNC                  ;Wait for SYNC

	lda #0                     ;load accumulator with 0
	sta REFP0                  ;store in sprite direction indicator ( for lower sprites )

        sty GRP0                   ;clear the sprite 0 and 1 registers
	sty GRP1

	ldx #0                     ;load x register with 0
Now that the rover sprite has been calculated and the sprite moved horizontally above, the sprite bitmap can be drawn across successive vertical scans at the correct horizontal position. This approach is optimized for a fixed vertical position – a layered set of sprites and resources. This way, a satellite can live on one layer, beamed data on another, a rover and science data on another, and indicator sprites below all of those.
Try it out.
For your amusement, here is a version that allows you to drive the rover around ( arrow keys ). You’ll notice that the sky moves when the satellite gets near the left edge – i have run out of time to update the satellite before the next scan!
Here’s the source for you to look at:
I’d like to thank Paulo A. Peccin for the awesome Javatari emulator embedded here. See his github repo here.
And also, a truly awesome project that builds off of that one – 8BitWorkshop, which provides an online IDE, compiler and emulator along with awesome tutorial examples – I wish that was around when I started!