I worked with a local filmmaker on a 360 degree VR video experience. I review my experience with node-based shaders to create a custom vignette for the application, and briefly discuss handwritten HLSL shaders to exploit depth data from Google’s 360 Jump hardware.
While working on the Virtual Burly project with Becky Lane, I wanted to try some vignette effects to constrain the view area for the user, and to mask out edge details that were distracting. Although I’ve written some shaders in HLSL ( see below for code and discussion ), I really like the feedback, control and assistance I get from node based shader editors, since shaders are primarily an aesthetic element. Unity has recently started to provide their own graph based shader editor, but I used the excellent Amplify Shader Editor which can still be obtained on the Unity Asset store.
Shaders are the biggest determinant of how color and light are handled in 3d graphics. A “fragment shader” like this one determines what color any pixel on the screen should be. The graphics card uses its massively parallel computing power to determine tens of thousands of pixels simultaneously. For this shader, I wanted to express a kind of fading shadow that gradually obscured the edges of the viewer.
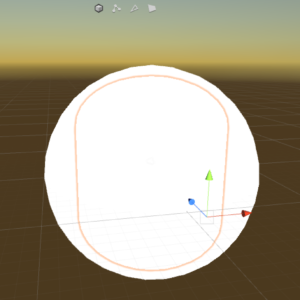
There are a few ways to handle 360 video in a scene. One is to replace the skybox with the rendered video. Another is to have a sphere that is attached to the player-camera. The shader for the sphere displays on the interior faces, and so as the user looks around, the video is projected all around them. I created a capsule-shape that is just inside the sphere, but around the player-camera. The vignette shader was attached to that capsule mesh.
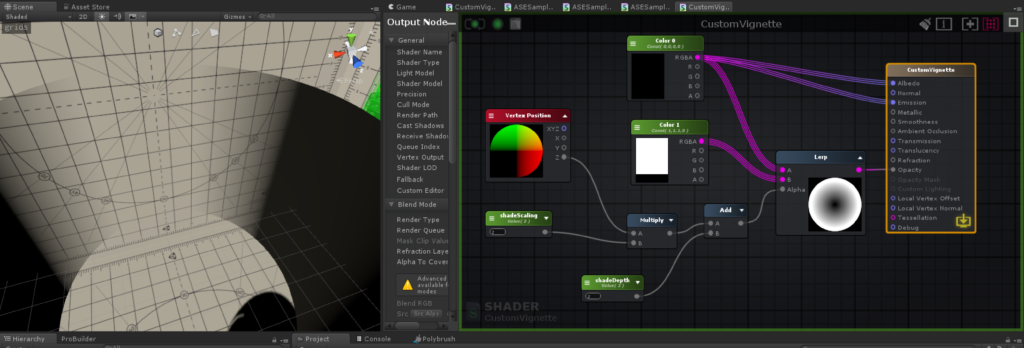
The shader node graph looks kind of complicated, but it’s easier to understand if you start with the output node ( the big orange outlined rectangle on the right. ) . You can see that the albedo ( color ) and emission ( glow ) are both mapped to the pure black color.
To determine the opacity of any pixel, we will Lerp ( interpolate ) between the white ( solid ) and black ( transparent ) values, based on another calculated value. That value is determined by considering the position of the currently drawn pixel against the underlying mesh vertexes ( the Vertex Position node ), and then multiplying and adding that against some tuning variables. Changing the tuning variables affects how far ‘forward’ on the capsule the fade starts, and also how quickly it fades from dark to light.

I found that a little research about slightly similar shaders plus some experimentation with inputs led me to a satisfying product. In-game, the effect is subtle, but really helps to dispel distractions when listening to the performers.
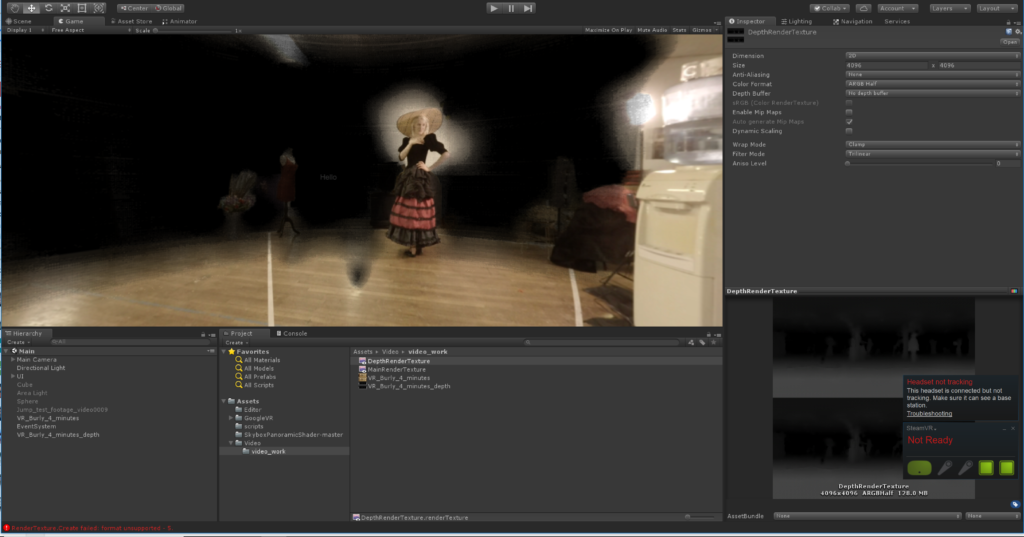
Depth aware experiments
At the start of the project, I did some experiments with a hand-written hlsl shader that would use the depth information from the Google Jump camera to provide a perfect vignette around the performers. The shader worked perfectly, but the depth information from the cameras was not sufficiently precise to allow the effect we wanted, and so I had to abandon it.